Friday, 13 June 2014
Monday, 2 June 2014
Commonly used Annotations in EJB
Annotation
Annotations are used to describe configuration meta-data in ejb classes. By this way EJB 3.0 eliminates the need to describe configuration data in configuration XML files.Purpose of annotation is to attach additional information in the class or a meta-data of a class within its source code.
Annotaions Majorly used in any EJB class
In general our IDE(Jdeveloper/NetBeans/Eclipse)generates some annotaions by default when we create entities.

1.@Entity
purpose
To convert normal class into Entity we
will use this annotation.we need to import javax.persistence.Entity API.
Example
@Entity //Now we convert this class
Test to an entity which will interact with DB---step 2
public Class Test(){//general class
—step 1
}
2.@ID
purpose
Used to mention the Primary Key in the
entity.import javax.persistance.ID
example:
@Entity
Public class Test(){
@ID //now mention like this column in
the table will act as PK—step 4
private int emp_Id; //field in this
class—step 3
//getter and setter
}
3.@GeneratedValue
Purpose
To mention the feature of Primary key
generation in our table.For example In our table EMP_ID if we select
Autogenerate the ID value.So in this scenerio we
need to mention this feature in our entity using this annotaion and
by sending strategy to generate the primary key.
Example
@Entity
public class Test(){
@ID
//we mentioned here the generation type
of Primary key in our table.we have
// 4 types of
Strategies(AUTO,SEQUENCE,IDENTITY,TABLE)-----step 5
@GeneratedValue(Strategy=GenerationType.Identity)
private int emp_Id;
//getter and setter for this field here
}
4.@Table:
Purpose
If we need to use some other name for
our class other than the original Table name,we will go for @Table
Annotation.So By using this annotaion we will going to connect the
original table with our entity class.
Example:
@Entity
@Table (name=”Test”)
//Original
table name in DB,and Previously we've used same name to our class,so
we no need to mention this annotation there.--step 7
Public class Sample() //class name
differs from table name.--step 6
{
@ID
@GeneratedValue(Strategy=GenerationType.Identity)
private int emp_Id;
//getter and setter for this field here
}
NOTE:
convention over configuration:
Configure only when the default
convention is not as per the requirements. Means here we can use
these annotations to configure the original table/fields mapping.(we have to make JPA understand this default is not we want).
5.@Column
purpose
Used to mention the original column name in the table whenever our field name differs from the original column in the table we used.
Example
@Entity
@Table (name=”Test”)
Public class Sample()
{
@ID
@GeneratedValue(Strategy=GenerationType.Identity)
//By using column annotation we aregoing to map the column name in the table.previously we used same name to our field so we no need to mention this annotation there--step9
@column(name ="emp_Id")
private int employeeID;//we used different name for this field and this not the default name what we want---step8
//getter and setter for this field here
}
6.@singleton
Specifies that there will be only one instance of this bean will be created in Application server.(used in class level)
7.@Startup
Intance of this bean is created whenever the applicaiton is deployed in the server.(used in class level).So by marking the class with @startup,We are telling the container like eagerly create the bean instance as soon as the application is deployed instead of waiting for some component to use it.
8.@PostContruct
First method to run when the instance is created.just like Main() method in normal Java class.
Example :
@Singleton//specifies that only one instance should be there in server
@Startup//instance of this bean(Test) is created when we deploy this application
public class Test(){
//When we deploy this application in server this is methond automatically run //if we annotate this using this annotation
@PostConstruct
public void myTestMethod(){
//code
}
}
9.@PersistenceContext
This is used to inject the entitymanager class in our entity and we need to pass the Persistence Unit name in this to work with entity manager transactions like CRUD operations in our J2EE applications.
Example
@Singleton
@Startuppublic class Test()
{
@PersistenceContext(name="//Persistence context name as in persistence.xml file of our application//")
EntityManager em; //here we just create a object of EntityManager type,in desktop applications we need to create entitymanager by using entitymanager factory
@PostConstruct
public void myTestMethod(){
//code
//here we can use the EntityManager transactions by using em to interact with //DB like em.persist();em.remove();
}
}
10.@Lob
To specify the functionality of the database to store Large objects(LOB) like Images,documents,Presentaions,pdf files.we have two types.(Blob-binary Large Objects and Clob -charecter Large Objects).
Example:
@Lob
private byte[] image;
//getter and setter
public byte getImage(){
}
public void setImage(byte Image){
}
11.@Basic
In the case like,Blod field not to be loaded eargerly(automatically),and to make the field to be loaded when ever someone access the field by using getter method of the field.
Example:
@Lob
@Basic(fetch=FetchType.Lazy)
// Lazy:Hint to the JPA Provider
This image field is loaded when some one access this field using getImage in our example.
//Eager:
This field is loaded automatically when the application is deployed
private byte[] image;
//getter and setter
public byte getImage(){
}
public void setImage(byte Image){
}
12.@Enumerated
To prevent user to not to enter any other random string into the field,and to restrict ther user to enter only specified values into that field,we will go for this Annotaion.
Example:
- Lets consider Gender field.In our DB we would like to store M/F values in this field.But normally when we create entities we use like
public class Test(){
private String gender;
public String getgender(){
}
public void setgender(String gender){
}
}
- So as we declare gender field as String ,user may allowed to enter any other String value other than M/F as per our requirement.(male/female/....).To restrict the user not to enter any other random string into this field,WE have to create a enum class first.Create NewEnum class
public enum Gender{
M, //These are the two constants in Gender enum class
F
}
- Now we need to modify our Actual Test() Class as
@Entity
public class Test(){
@Enumerated(EnumType.String)//Here two types of enum types are there
1.Ordinal-Default type which will store 0/1 in DB
2.String-It will store the actual constants M/F which we have mensioned in our enum class into DB.
@Column (name="gender")
private Gender gender;
public Gender getgender(){
}
public void setgender(Gender gender){
}
}
- Usage
Test.setgender(Gender.F);
13.@Temporal
If we have any Date field in our DB,By using this annotaion we can prevent the format of data to be stored in this field like date,time, date and time.....
Example
@Temporal(TemporalType.DATE/TemporalType.TIME/TemporalType.TIMESTAMP)
@Column(name="Join_date")
private Date HireDate;
14.@Transient
Used to mark a filed that should not be persistence in database when we save the entity data into database forexaple using em.persist().
Example:
@Transient
private String empString;
when we call em.persistence() this field empString wont be stored in DB.
:)
Monday, 12 May 2014
Creating Threads in JAVA
Introduction to multithreading
Thread Creation
We can Create threads in Java by using the following two ways.
- By Extending Java.lang.Thread class.
- By implementing the Java.lang.Runnable interface.
- Create thread by extending Thread class
- The class should extend Java Thread class.
- The class should override the run() method.
- The functionality that is expected by the Thread to be executed is written in the run() method.
Example:
class MyThread Extends Thread{ Public Void run(){ system.out.println("thread started running....."); } } class MyThreadDemo{ Public Static void main(String srgs[]){ | |
| MyThread obj=new MyThread(); obj.start(); } } | |
2.Create Thread by implementing Runnable interface |
- Other way of creating a thread is to create a class that implements the Runnable interface. We must need to give the definition of run() method.This run method is the entry point for the thread and thread will be alive till run method finishes its execution.
- Once
the thread is created it will start running when
start()method gets called. Basicallystart()method callsrun()method implicitly.
class MyThread implements Runnable{
Public Void run(){
system.out.println("thread started running.....");
}
}
Public Void run(){
system.out.println("thread started running.....");
}
}
| class MyThreadDemo{ Public Static void main(String srgs[]){ | |
| MyThread obj=new MyThread(); Thread t1=new Thread(obj); t1.start(); } } | |
Multi-threading in Java
Thread??
- Multi-tasking allows multiple programs to be run at the "same" time. Lets visualize this as each application as running on its own processor.

- Just like programs can run concurrently, pieces of the same program can run concurrently. This ability is known as Threading.

- Lets consider a very simple example.Lets assume that we have an array of 10000 like
Array a[10000];
- Here our task is to add all the array element values.so generally we use some thing like
sum=sum+sum[i];
}
- So by adding all the 10000 values by single process(or like by one person) it will take lot of time to do this.
- Instead of doing this as a single program ,Lets divide this tasks among 10 persons as 10 pieces of tasks(threads)like
person1 =add a[1] to a[1000]--->thread 1
person2 =add a[1001] to a[2000]--->thread2
.........
person10=add a[9001] toa[10000]-->thread 10
- Lets allow all these 10 multiple threads run concurrently.So we will save time and work load of single program by performing multithreading.
Multithreading in java
Java multithreading allows you to do multiple tasks at the same time.
- Every java program creates at least one thread [ main() thread ]. we can create additional threads whenever needed.
- In Java, the Java Virtual Machine (JVM) allows an application to have multiple threads of execution running concurrently. It allows a program to be more responsible to the user. When a program contains multiple threads then the CPU can switch between the two threads to execute them at the same time.
- Threads are lightweight processes; they share the same address space. In Multithreaded environment, programs make maximum use of CPU so that the idle time can be kept to minimum.
- There are several thread states, A thread can be in any one of the state at a particular point of time. It can be running state. It can be ready to run state as soon as it gets CPU time. A running thread can be suspended. A suspended thread can be resumed. A thread can be blocked when waiting for a resource. At any time a thread can be terminated.
Whats the need of a thread or why we use Threads?
- To perform asynchronous or background processing
- Increases the responsiveness of GUI applications
- Take advantage of multiprocessor systems
- Simplify program logic when there are multiple independent entities
What happens when a thread is invoked?
When
a thread is invoked, there will be two paths of execution. One path
will execute the thread and the other path will follow the statement
after the thread invocation. There will be a separate stack and
memory space for each thread.
Thread Lifecycle

- New state : After the creations of Thread instance the thread is in this state but before the start() method invocation. At this point, the thread is considered not alive.
- Runnable (Ready-to-run) state A thread start its life from Runnable state. A thread first enters runnable state after the invoking of start() method but a thread can return to this state after either running, waiting, sleeping or coming back from blocked state also. On this state a thread is waiting for a turn on the processor.
- Timed waiting is a thread state for a thread waiting with a specified waiting time.
- waiting state due to the calling one of the following methods without timeout:Object.wait() or Thread.join()
- blocked : A thread can enter in this state because of waiting the resources that are hold by another thread.
- After thread has completed execution of run() method, it is moved into terminated /Dead state . If any thread comes on this state that means it cannot ever run again.
Note, that thread in the waiting state is waiting for another thread to perform a particular action. For example, a thread that has called Object.wait() on an object is waiting for another thread to call Object.notify() or Object.notifyAll() on that object. A thread that has called Thread.join() is waiting for a specified thread to terminate. It means that waiting state could be made a composite state with states corresponding to these specific conditions.
Methods to Manage Threads:
- getName() :This is used to obtaining Thread's Name.
- setName() :To give thread a name.
- getPriority() :Obtains a thread Priority.
- isAlive() :Determine If the thread is still running.
- join() :Wait for a thread to terminate.
- run() :Entry point for the thread.
- sleep() :suspend a thread for a period of time.
- start() :Start a thread by calling its run() method.
- notify() :This wakes up threads that called wait() on the same object and moves the thread to ready state.
- notifyAll() :This wakes up all the threads that called wait() on the same object.
- Yield() :It is used to give the other threads of the same Priority a chance to execute i.e.causes current running thread to move to reunnable State.
- Stop() :The stop() method is used to stop the execution of a thread before its run() method terminates.
To know how to create threads..please click here.
Friday, 9 May 2014
ADF Video Tutorials by Oracle
References:
ADF Video tutorials provided by Oracle.
Also we can find Oracle's ADFInsiderEssentials
we can found number of tutorials with good explanation and examples here.
ADF Video tutorials provided by Oracle.
Also we can find Oracle's ADFInsiderEssentials
we can found number of tutorials with good explanation and examples here.
Wednesday, 7 May 2014
What's New JAVA 8 Release
JAVA 8
“Java Platform, Standard Edition 8 (Java SE 8)” is released on 18th March 2014. Along with the Java SE 8 platform, the product that implements the platform, “Java SE Development Kit 8 (JDK 8)”Java SE 8 is one of the most feature packed release in the JavaHistory.
Highlight Features in Java 8 Release:)
- Permanent Generation
- Parallel Array Sorting
- Lambda Expressions
- Optional Class API
- Date & Time API
- Functional Interfaces
- Pipelines and Streams
- Type Annotations
- Default Methods
1.Permanent Generation
What does it mean??
- who has never configured their "PermSize" or their "MaxPermSize" JVM memory?
- This was normally done after receiving those ugly "java.lang.OutOfMemoryError:PermGen error" errors.
- This is now replaced by Metaspace in this release.The Metaspace will re-size itself depending on the demand we have of memory at runtime.If we need to,we can still tune the amount of Metaspace by setting "MaxMetaSpaceSize" param.
2.Parallel Array Sorting
We are used to sorting arrays with “Arrays.sort”. This used Merge Sort or Tim Sort algorithms for the sorting. The problem they have is that they are executed sequentially, so we do not gain all the benefits multithreading has to offer us. For this purpose they implemented “Arrays.parallelSort”.
3.Lambda expressions
- Lambda expressions might be the biggest and most anticipated feature of Java 8. They are basically used to pass code instead of objects to a method or to deal with group of data to execute algorithms.
- This will produce much simpler and more readable code. Lets take a look at some concepts around this.
- The normal approach in Java is to iterate collections externally, so we would have something like this:
for (String value: myCollection) {
System.out.println(value);
}
- syntax for Lambda expressions:
- What we are doing here is iterating the list and pulling objects one by one. It would be more natural if we could just say from the beginning what we want to extract form the collection. This is exactly the concept of how we would do it with lambdas:
myCollection.forEach((String value) -> System.out.println(value));
4.Optional Class API
Why?
- Every Java programmer is maddened every once in a while by the notorious
NullPointerException. Not only Java programmers, by the way. Probably every JVM programmer is suffering from the problem.
NULL??
- In Java
nullis actually a type, a special one: it has no name, we cannot declare variables of its type, or cast any variables to it, in fact there is a single value that can be associated with it (i.e. the literalnull), and unlike any other types in Java, a null reference can be safely assigned to any other reference types.
what??
The newer version of Java i.e Java 8 introduces a new class called Optional. The Javadoc for Optional class says:Optional class is supposed to cure NullPointerExceptionsA container object which may or may not contain a non-null value. If a value is present, isPresent() will return true and get() will return the value.
All features and samples will update soon.....
01_EJB_Introduction_TO_EJB
EJB
- EJB stands for Enterprise Java beans.
- This will come into service layer in the J2EE architecture where all of our business logic reside.
- For example business operations like manupulating database,sending mails,sending messages to message queues.
- J2EE container Provides some facilities to EJB like Transaction,security,pooling,concurrency,Timers,Intersepters..
Types of EJBS

1.Stateless Session Bean
- The container usually maintains a pool of instances of beans.
- When a client invoke the method of bean first one instance may picked up by the container and one more time the client trying to access the other method in the bean may be some other instance invoked by the container.So first instance may not aware of the values of other instance of the same bean.So we cant store state info in this case.
- We should not save the State in this bean.Means we cant store any values for the variables and state information like
@stateless
Public String getHello( String Name){
String EmpName=Name; //We cant store like values
}

- Most of the business operations are singular.Like sending Mails and logging in user..They dont want to store the state of information.In such cases we may use Stateless session bean.
In this type of beans the container managed the pool of instances.
.
2.Stateful Session Bean


- This beans are Client oriented.There is one instance of bean for each client.
- If a client invoke a method of bean one instance get created and the client will invoke another method of the bean and save some state and second time the perticular instance only get picked up for the specific client.So it will maintain the state information.
- There is no pool of instances of the bean in the container,the instance is created just before the client get serviced.
- The client is supposed to issue the command in this type of bean.But in stateless session bean container will maintain the instances.
3.singleton Session Bean
- Only one instance this bean per application server.Every client will invoke the same instace anyway some concurrency mechanisms are there to avoid conflicts.
- If we have 2 JVMs in our server it will create two singleton instances per each JVM.Also in distributed systems environment we have different JVMs and this sigleton bean will create each instance per each JVM:)
Note:
Clients:
Lets assume one bean in service layer(EJB).This bean may be accessed by another bean(another EJB) in the same layer or in web layer(using JSP or JSF) or some other layer with the same container or from outside..
Local:Beans reside within application server.
Remote:When beans reside outside the Application server known as Remote clients.
What's New in J2EE 7
Java EE 7 is the latest edition of the enterprise platform that powers a lot of (web) applications.
Top Features of J2EE 7
- Batch Applications
- Web Socket
- JSON Processing
- More Annotated POJOS
- concurrency Utilities
New Releases of J2EE 7 technologies
- HTML 5
- JAX-RS 2.0 (Java API for Restful(RePresentational State Transfer) Webservices)
- JMS 2.0
- JPA 2.1 (Java Persistance API)
- JSF 2.2 (Java Server Faces)
- Expression Language 3.0
- CDI 1.1 (Contexts and Dependency Injection)
- EJB 3.2 (Enterprise Java Beans)
- Batch Application for Java Platform 1.0
- Concurrency Utilities for J2EE
- Servlet 3.1
- Bean Validation 1.1
- Java Mail 1.5
- JCA 1.7 (J2EE Connector Architecture)
- Java API for Web socket 1.0
- JTA 1.2 (Java Transaction API)
- Java API for JSON Processing 1.0 (Java Script Object Notation)
Tuesday, 6 May 2014
Working_with_JMS_Artifacts
Please refer introduction.
JMS Artifacts
To work with any JMS Application we need to first create the following artifacts in Weblogic console.(Install and run weblogic server if you are not install yet/ Run Integrated weblogic server which are working with).
- JMS Server
- JMS Module
- JMS Subdeployment
- JMS ConnectionFactory
- JMS Queue/JMS Topic(These are the destinations we need to create Based on our Requirement..see introduction).
Creating JMS Artifacts in Weblogic console
- Login to Weblogic Console."http://localhost:7001/console".

JMS Server
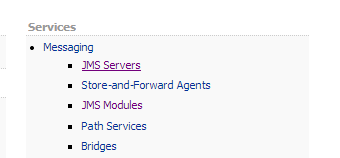
- Click on Services-->Messenging-->JMS Servers.
- Click on New To Create new JMS Server.

- Enter any Name for JMS server and click next.

- NextScreen,Select Target as Admin server and click finish.

- Observe that JMS server created successfully and your server name in the list of JMS servers

JMS Module
- From Weblogic console Home page click on JMS Module.

- Click on New to create New JMS Module.

- Enter any name for JMS Module and Click next.

- Select Target as Admin server and Click next.

- Select the Check box to add our resources to JMS Module and click Finish.

- It will navigate to JMS Module Configuration Page.Go to Subdeployments tab,To create New Sub deployment to our JMS Resources.And Click on New.

- Enter any Name for Subdeployment and click next.

- Select your JMS Server which we have created earlier as targets and click Finish.(dont select admin server)

- Make sure that your subdeployment created for the JMS Module.

JMS ConnectionFactory
- JMS Modules-->click on your JMS Module-->Configuration Tab,click on New To create JMS Resources.

- First Select Connection Factory Radio button and click next.

- Enter any Name and JNDI Name for Connection factory as follows.We will use this Jndi name in our Application while working with JMS.Click Next.


- Click on Advance Targeting to Point our Subdeployment which we have created earlier.

- Click Finish.
JMS Queue
- Like Connection factory we need to Create JMS Destination (Here JMS Queue) as follows.

- In the Resources select Queue and click next..ENter any name For JMS Queue and JNDI name for it..We will use this JNDI name while sending messages to JMS Queue in our Application.

- Click Next.Select our subdeployment and click Finish.

JMS Topic
- Create JMS Topic.

- Enter JMS Topic and JNDI Name.

- select the Subdeployment and click finish.

- Done...
Now we are ready to work with JMS Application to send and recieve messages from JMS Queue/Topic when two different applications wants to communicate with each other.
sample Application will update soon..
Subscribe to:
Posts (Atom)