Please refer introduction.
JMS Artifacts
To work with any JMS Application we need to first create the following artifacts in Weblogic console.(Install and run weblogic server if you are not install yet/ Run Integrated weblogic server which are working with).
- JMS Server
- JMS Module
- JMS Subdeployment
- JMS ConnectionFactory
- JMS Queue/JMS Topic(These are the destinations we need to create Based on our Requirement..see introduction).
Creating JMS Artifacts in Weblogic console
- Login to Weblogic Console."http://localhost:7001/console".

JMS Server
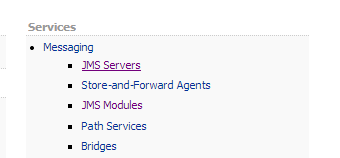
- Click on Services-->Messenging-->JMS Servers.
- Click on New To Create new JMS Server.

- Enter any Name for JMS server and click next.

- NextScreen,Select Target as Admin server and click finish.

- Observe that JMS server created successfully and your server name in the list of JMS servers

JMS Module
- From Weblogic console Home page click on JMS Module.

- Click on New to create New JMS Module.

- Enter any name for JMS Module and Click next.

- Select Target as Admin server and Click next.

- Select the Check box to add our resources to JMS Module and click Finish.

- It will navigate to JMS Module Configuration Page.Go to Subdeployments tab,To create New Sub deployment to our JMS Resources.And Click on New.

- Enter any Name for Subdeployment and click next.

- Select your JMS Server which we have created earlier as targets and click Finish.(dont select admin server)

- Make sure that your subdeployment created for the JMS Module.

JMS ConnectionFactory
- JMS Modules-->click on your JMS Module-->Configuration Tab,click on New To create JMS Resources.

- First Select Connection Factory Radio button and click next.

- Enter any Name and JNDI Name for Connection factory as follows.We will use this Jndi name in our Application while working with JMS.Click Next.


- Click on Advance Targeting to Point our Subdeployment which we have created earlier.

- Click Finish.
JMS Queue
- Like Connection factory we need to Create JMS Destination (Here JMS Queue) as follows.

- In the Resources select Queue and click next..ENter any name For JMS Queue and JNDI name for it..We will use this JNDI name while sending messages to JMS Queue in our Application.

- Click Next.Select our subdeployment and click Finish.

JMS Topic
- Create JMS Topic.

- Enter JMS Topic and JNDI Name.

- select the Subdeployment and click finish.

- Done...
Now we are ready to work with JMS Application to send and recieve messages from JMS Queue/Topic when two different applications wants to communicate with each other.
sample Application will update soon..
No comments:
Post a Comment
test